

About Information architecture
Information architecture is the organising and labelling of content to make the website usable and understandable. We classify content and arrange it into similar themes.
For microsites, this can look a little different to our core site as they are generally smaller in size and are already part of one ‘theme’.
But the same principles apply;
- Clear linking and signposting to related content
- Logical placement of pages in menus
- A map of our services
- A logical site structure so that users who come into the site from their web browser or a direct link can find their way around.
It’s worth keeping in mind that the way a service may want the website arranged is not necessarily how a user would navigate. The majority of users find pages directly from search, rather than navigating the internals of the website.
We use a few methods for this, such as;
- Card sort – using a kanban to sort into themes
- Affinity mapping – lay out everything and in a group, arrange into areas and sub-sections
- Sticky sort – add each page as a sticky note and create levels of content and how they connect
Content is the core of the website. So we usually start here to enable us to create wireframes of the visuals.
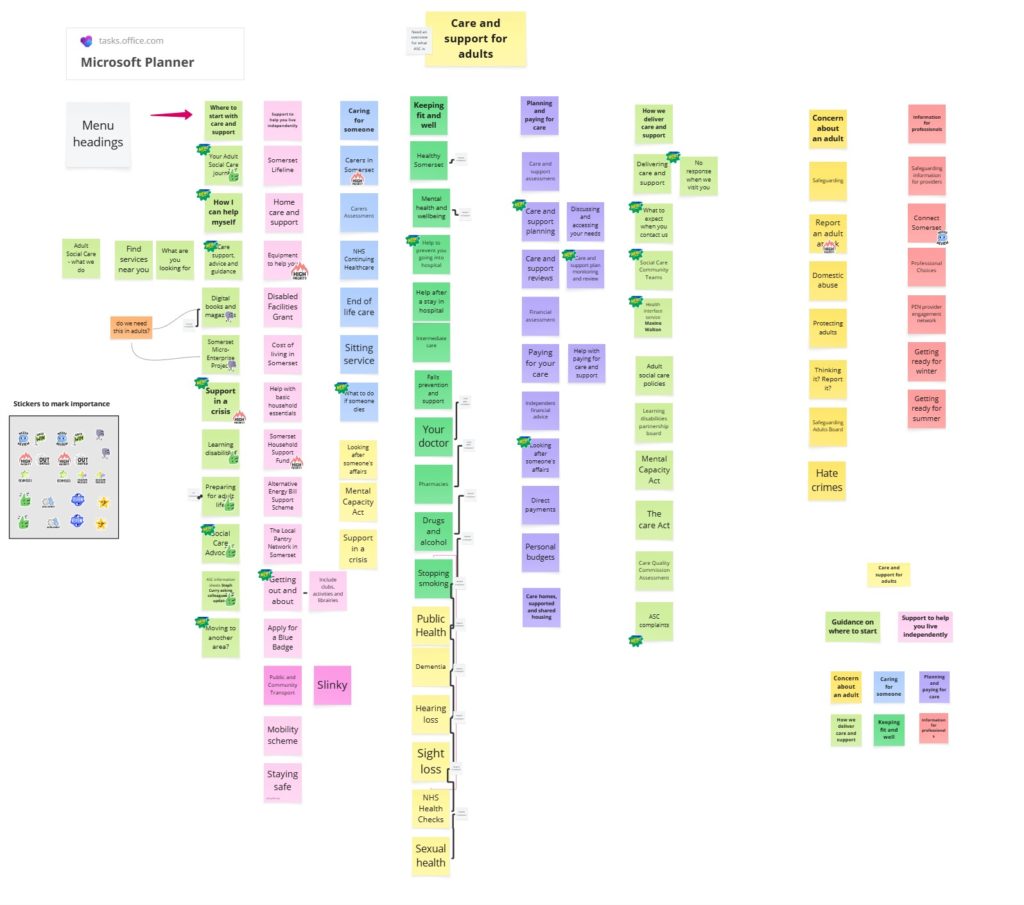
Example of a sticky mapping exercise
Wireframes
Wireframes are basic, non-interactive sketches (digital or analogue) used early in a project to show how a website or app will be organised.
They help designers and others involved get a clear idea of the layout and features before moving on to detailed design or building.
- Focus on Layout: They prioritise the placement of elements and the overall structure rather than detailed visuals or animations.
- Cost-Effective and Quick: Wireframes are inexpensive and can be created rapidly, allowing for quick iterations and adjustments.
- Communication Tool: They help bridge the gap between designers, developers, and stakeholders by providing a clear visual reference.
Wireframes are great because they are quick to create and can be iterated on easily based on initial feedback.
Once we have a good MVP (minimal viable product) wireframe, we can move on to prototyping.
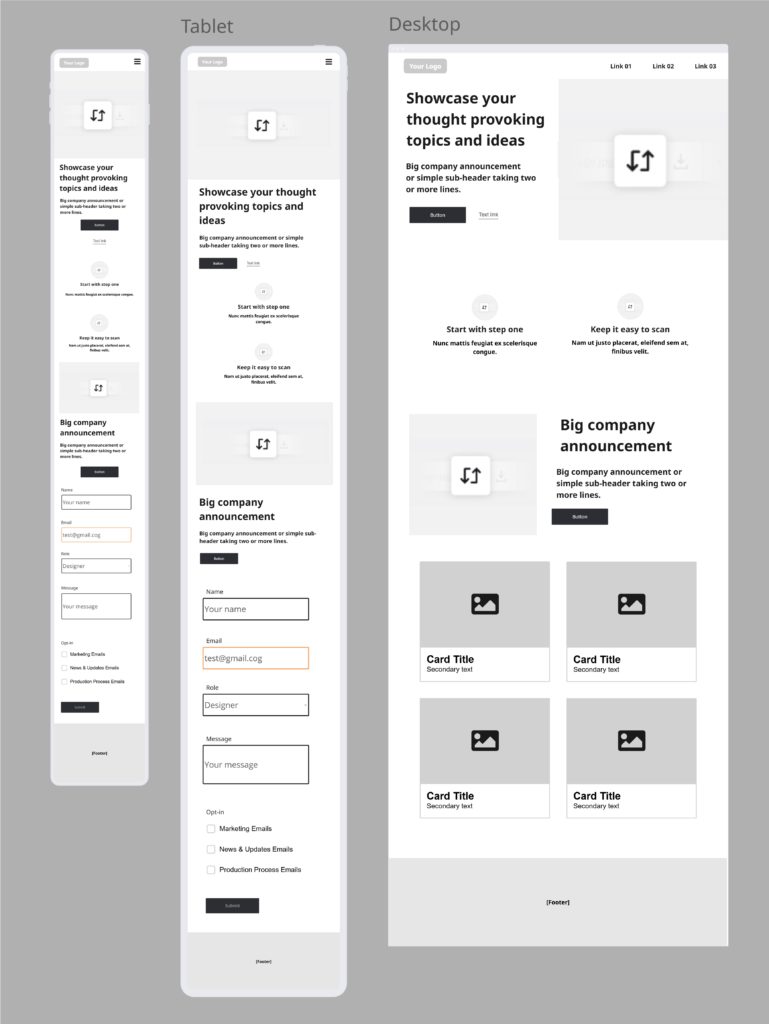
Example of a basic wireframe
Prototypes
Prototyping means making a rough version of a product to test and improve it before the final version is made.
It helps designers try out ideas, get feedback, and fix problems early in the process.
Low-Fidelity Prototyping:
These prototypes are often paper-based, offering a quick, rough preview of the product. Low-fidelity prototypes are ideal for early brainstorming sessions and collaborative discussions, providing a basic skeleton of the design that is both fast and cost-effective to produce.
Medium-Fidelity Prototyping:
Medium-fidelity prototypes are interactive and clickable, offering a more detailed and realistic representation than low-fidelity prototypes. They typically include limited functionality and are often built upon storyboards or user scenarios, providing a better sense of how the product will work in practice.
High-Fidelity Prototyping:
High-fidelity prototypes are highly detailed, fully functional, and interactive. These prototypes closely resemble the final product, making them ideal for user testing and obtaining final design approvals before moving into development or testing. They provide a realistic experience, allowing stakeholders to see exactly how the product will look and function.
Benefits of Prototyping
- Saves Time and Money: You can spot and fix problems early, so you don’t waste time or money later.
- Makes Work Easier: A prototype shows what the design looks like, helping everyone understand the plan.
- Keeps Everyone on the Same Page: It helps teams share the same vision and work better together.
- Improves Results: Testing the design early helps make it more user-friendly, which can lead to better outcomes (like more people using or buying the product).
- Finds Problems Early: You can catch bugs or confusing parts before the final version is built.
- Involves Users: Users can give feedback early, helping create something that works for them.
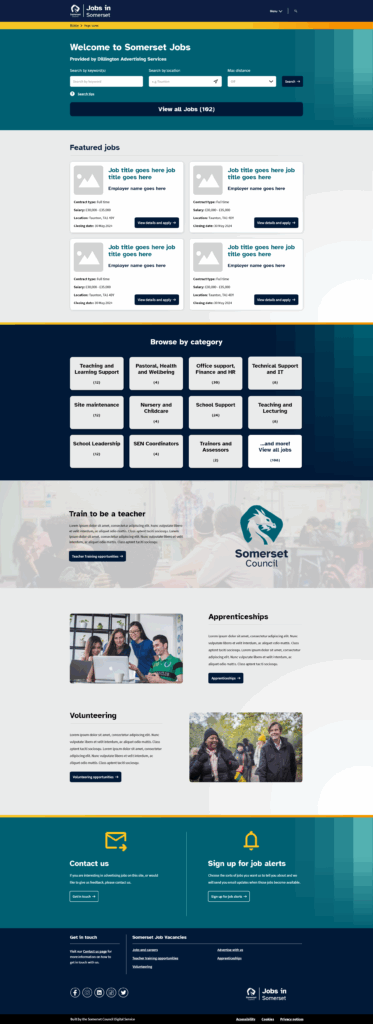
Example of a high-level prototype of Jobs in Somerset